TRAIN AVANT
FRONT WHEEL
Préparation du pantalon de train avant :
Preparation of front tube fairing :
- "Enveloppez" le tube fixe de train avec le pantalon.
Fermez le bord de fuite avec des bitards.
- "Wrap" the front leg fairing around the outer tube. Close the trailing
edge with cleco fasteners
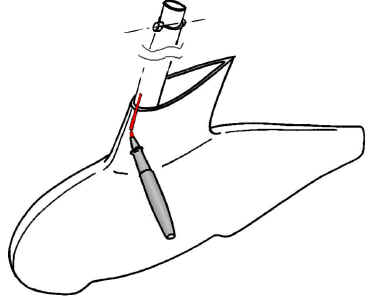
- Insérez les nervures en alu
pour repérer les percages nécessaires ŕ la fixation, ŕ travers les trous pré-percés
dans le pantalon :
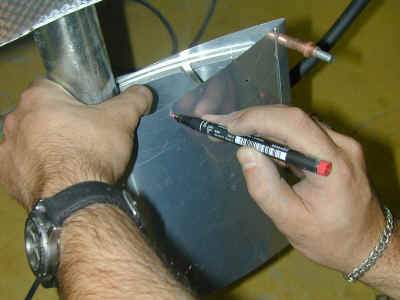
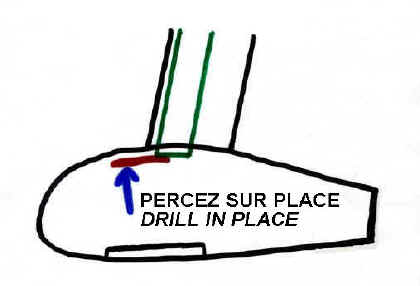
- repérez au stylo seulement le trou
avant gauche
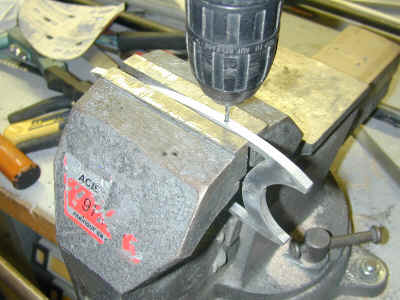
- démontez et percez dans l'étau
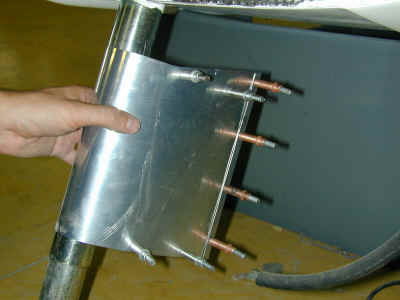
- remontez et maintenez avec un bitard
- repérez le trou avant droit. Ne
serrez pas trop la nervure sur le tube, le pantalon doit pouvoir tourner librement.
- démontez et percez
- remontez et maintenez avec un bitard
dans chaque trou
- repérez les deux arričres
- percez.
- Insert the aluminium ribs inside the fairing behind the tube, to locate the
drillings required to fix them, through the pre-drilled holes in the pant :
- locate with a pen only the front left
one
- remove the rib and drill on the
bench vice
- re-install and hold with a cleco
- locate the front right one. Do
not hold the rib too tight on the tube, the fairing must be able to rotate freely.
- remove and drill
- re-install and hold with one cleco in
each hole
- locate the two back ones
- drill.

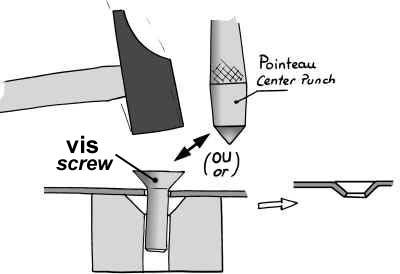
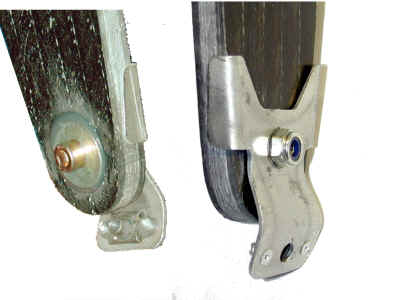
- Fabriquez-vous un outil (trčs simple) pour "embrever" les
trous dans la tôle du pantalon . N'embrevez pas les trous du bord de fuite
- Make yourself a small jig (very simple) to dimple the holes in the fairing plate. Do
not dimple the trailing edge ones.
- Fraisez les trous dans les nervures.
- Countersink the holes in the ribs.
- Assemblez le tout avec des rivets TF dans les nervures et des rivets TP
au bord de fuite.
- Assemble everything with Countersunk Head rivets in the ribs, and Round Head rivets
on the trainling edge.
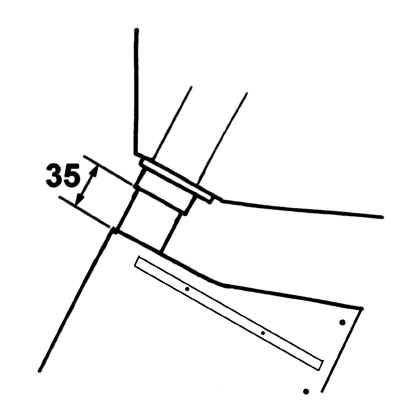
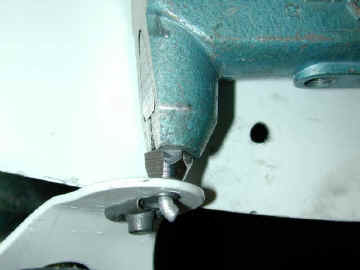
- Montez le pantalon sur la
jambe fixe dčs maintenant, le haut doit ętre ŕ 30 mm sous la collerette soudée au
tube.
- Install now the tube fairing on the outer tube, the top of it must be 30 mm under the
collar welded on the tube.
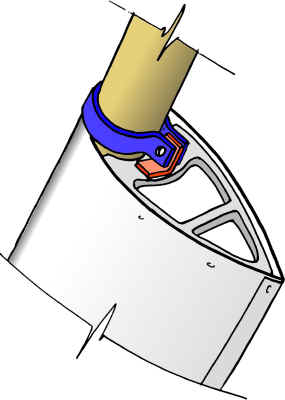
- Maintenez-le en place avec les colliers et la patte en équerre :
celle-ci doit s'appuyer contre les nervures en alu, en dessous et au dessus, pour le
bloquer de bas en haut.
- Hold it with the aluminium clamp and the 90° bracket : it must sit on the aluminium
ribs, to prevent it from sliding along the tube.
- VERIFIEZ QU'IL PEUT TOURNER LIBREMENT SUR LE TUBE.
- CHECK FREE ROTATION ON THE TUBE.
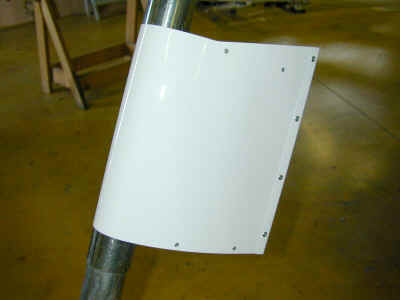
Préparation de la carčne :
Fairing preparation :
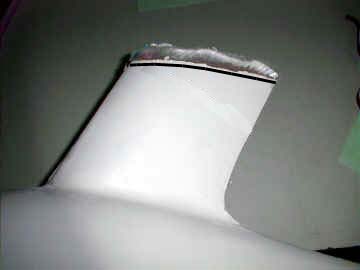
Planche TCI de référence : NPLPB.00
Referent parts catalog page : NPLPB.00
- Couper le col de la carčne (rep 1) , en laissant le plus de matičre possible.
- Cut the wheel fairing neck (item 1) , leaving as much stuff as you can.

- Fixez le support de la carčne (en forme de Y) sur les 2 boulons
avant de la fourche
- Install the front wheel spat support (Y shape) on the 2 front fork fixation bolts .
- Attention ne montez pas l'écrou prisonnier maintenant !
- Attention don't rivet the captive nut now
- Enfilez la carčne sur la roue sur le train (il est normal de la
déformer pour passer la fourche).
- Slide the front wheel spat on the gear (it's normal to have to bend it to pass
around the fork).
- Vérifiez qu'il y a assez de jeu autour du pneu
- Check there is enough clearance around the tyre.
- Appuyez la carčne sur le support (tordez le support ŕ la pince pour
qu'elle s'appuie ŕ plat)
- Apply the spat on the Y support (fold it with plyers so that the spat sits flat on
it).
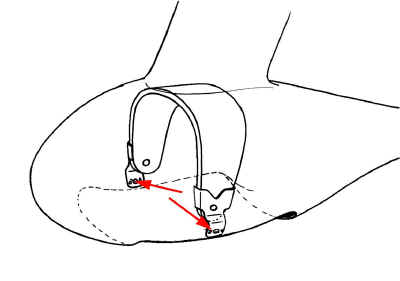
- Alignez la carčne ŕ la roue :
- Align the spat with the wheel direction :
faites rouler le train sur quelques mčtres
Drive the gear in front of you on a few meters
alignez la carčne dans l'axe
align the spat in the wheeling direction
montez le tube fixe et verrouillez-le dans l'axe
install the fixe tube and lock it in the axis
tracez un trait de repčre sur le col de la carčne et le tube de train
fixe
mark a line on the spat neck and on the fixed gear tube.
Remarque : le plan de joint n'est pas dans l'axe !!! Ne
vous en servez pas comme référence.
Note : the glueing line is not on the symmetry plane of the spat,
don't use it as a reference.
- Démontez la roue
- Remove the wheel

- Repositionnez la carčne en place.
Le bord d'attaque du col doit etre parallele au tube . Laissez un jeu de 1 mm
autour du pantalon.
- Re-install the spat in place
The spat neck leading edge must be parrallel to the tube. Leave 1 mm clearance
around the tube fairing.
- Contre-percez D5 par en dessous, au travers du trou de fixation du
support Y.
- Backdrill D5 from the bottom , through the Y shape support hole.
- Ôtez la carčne
- Remove the spat
- Rivetez l'écrou prisonnier
- Rivet the captive nut.
- Montez provisoirement les supports latéraux avec des boulons de 6
- Install temporary the side supports with 6 mm bolts.
- Tordez les pattes avec une pince pour que la carčne s'appuie ŕ plat
dessus sans ętre déformée.
- Bend the brackets so that the spat sits flat on them, without being deformed.
- Assurez-vous que la carčne est bien dans l'axe
- Make sure the spat is straight in line.
- Contre-percez par l'intérieur
- Backdrill from inside
- Rivetez les écrous prisonniers
- Rivet the captive nuts