 Retour
sommaire.
Retour
sommaire.

EQUIPEMENT DE L'ARCEAU DE VERRIERE -MCR-4S
MCR-4S CANOPY FRAME INSTALLATION
Edition
11/2001
[maj 01/10/2002]
Vérin de verrière
Canopy lift gaz strut.
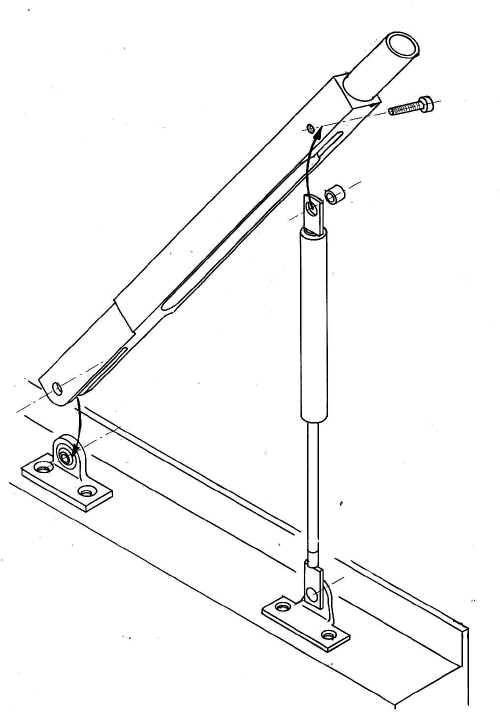

Attention : monter le vérin avec la tige en bas.
Attention : put the gas strut with the rod pointing downwards.


(les proportions du dessin sont exactes)
(proportions on the above drawing are exact)
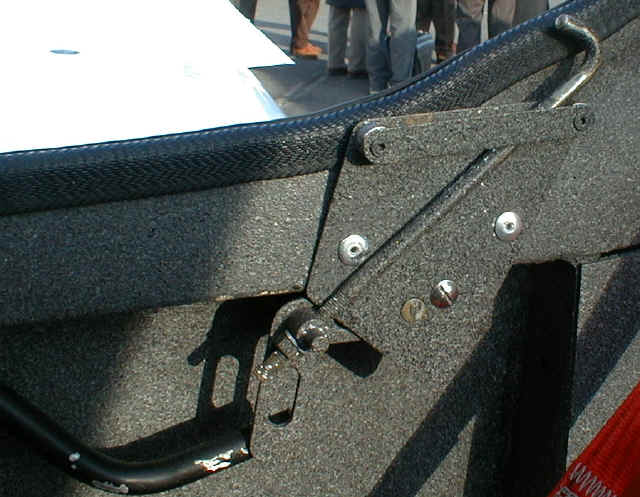
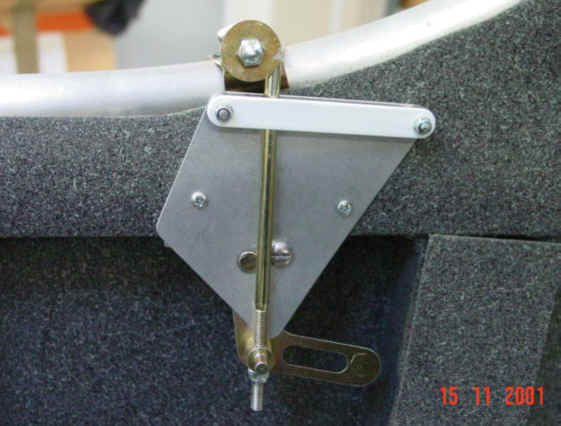
Montez le systeme de fermeture : ATTENTION l'ordre de montage est important :
Assemble the locking device : ATTENTION the order of the steps is important.
- Posez le support du systeme sous le barreau de fuselage 60 mm devan le couple 7Av
Percez le fuselage D8 au travers de l'axe, pour laisser passer l'axe du levier.
Lay the system support under the fuselage beam 60 mm in front of the frame #7 front.
Drill the fuselage wall D 8mm through the support hole, to leave the lever shaft protrude
outside.
- Assemblez le support - le levier - la plaque alu. Maintenir avec la vis poelier M4 sans
serrer
Assemble the support + lever + aluminium plate. Hold with the M4 poelier screw but
don't tighten yet.
- Remettre en place : le support sous le barreau et la plaque contre le flanc du barreau.
Contre-percez D3.2 horizontalement à travers la plaque (sans déboucher à l'extérieur
!) et fixez avec des bitards
Contre-percez D 4 verticalement à travers le support .
Install the assembly : the support against the underside of the fuselage beam and the
plate against the side.
Drill 3.2 mm horizontally through the plate (don't drill through, only half way) and hols
with clecos.
Drill vertically through the support, D4mm. Drill all the way through.
- percez D 8 uniquement l'arrondi du fuselage supérieur
enlarge the hole D8 , only the upper fuselage.
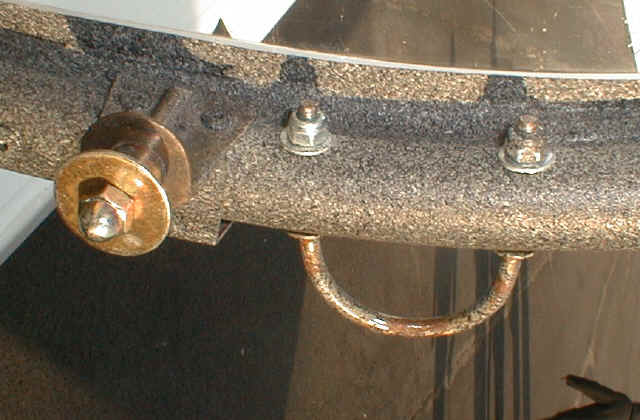
- Fixez le support avec des vis CHC M4 collées à l'époxy. LA TETE DOIT REPOSER A PLAT
SUR LE BARREAU DE FUSELAGE INFERIEUR. Les vis resteront noyées au fuselage (mastic par
dessus).
Fixez la plaque avec des rivets 3.2*8 epoxy
Fiw the support with CHC M4 screws glued with epoxy. The had must lay flat on the
lower fuselage beam. The screws will remain in the fuselage, (you can fill the holes).
- Montez le crochet et son axe sur le levier (intercalez une rondelle D 5x10 entre le
levier et l'axe du crochet)
Install the hook with its shaft on the lever (put a 5x10 mm washer between the lever
and the hook shaft).
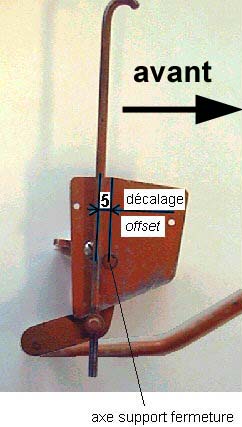
- Déterminez AVEC PRECISION la position du pion sur
l'arceau (position impérative : le
fonctionnement du système dit à "genouillère" impose de dépasser le serrage
maximum pour avoir un verrouillage stable)
- Ajustez la longueur du crochet pour avoir un
léger serrage
- Vérifiez la position en faisant fonctionnner le système plusieurs fois.
- puis contre-percez et fixez avec des vis.
Find PRECISELY the position of the hook pin on the canopy frame ( the system will work
properly only if the hook goes a little more that the top dead centre, to get a stable
locking) :
- Set the length of the hook to have a slight tightening
- check the position by actuating the system several times
- then frill the frame though the pin support and fiw with screws

Percez les trous de fixation du cavalier de centrage au milieu de
l'arceau, environ 25 mm derrière le pion de verrouillage.
Drill the holes to fiw the centering device in the centre of the frame, about 25 mm
behind the hook pin
- Verrouillez la verrière et assurez-vous que l'arceau est correctement centré dans les
cales de 5 mm
Contre-percez le fuselage au travers des trous de fixation des cavaliers de centrage, pour
déterminer la position des "boites" où ils viennent se loger.
Lock the canopy and make sure the frame is correctly centered.
Drill the fuselage though the centering device fixation holes, to find the position of the
"boxes" where they will fit.
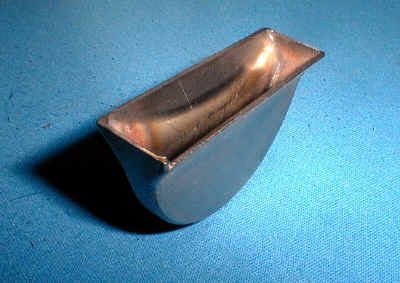

- Détourez le fuselage pour y coller les logements des cavaliers. (colle époxy). ATTENTION
coupez seulement la premiere peau de carbone sans entamer le raidisseur qui se
trouve +/- 1 cm dessous
Cut the fuselage upper skin to fit the centering device boxes (epoxy glue). ATTENTION
: cut only the first upper carbon skin, don't damage the fuselage beam about 1 cm
underneath !
- . Montez les 2 entretoises et le guide-crochet
Install the spacers and the guide plate for the hook.
Retour
sommaire.