
ASSEMBLAGE DU TAB CARBONE
CARBON TAB ASSEMBLY
[maj 03/03/09]
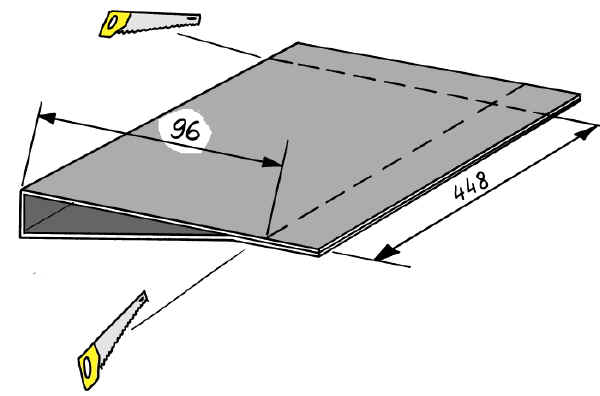
Détourez le tab aux cotes indiquées (vous pouvez laisser un peu plus et
finir aprčs assemblage final).
Cut out the tabs according to the drawing above (you can make it sligly bigger and
trim it after final assembly).
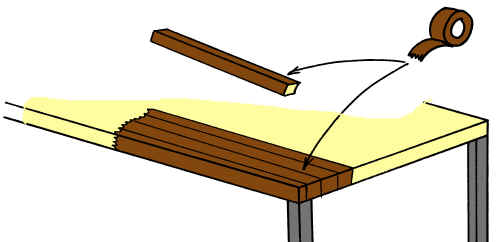
Préparez une table et une rčgle en bois de 50 cm avec du scotch
d'emballage, vérifiez qu'elle soit bien plane sinon le tab serait vrillé
Prepare a table and a 50cm long piece of wood with packing tape, check it is well flat
otherwise the tab will be twisted.
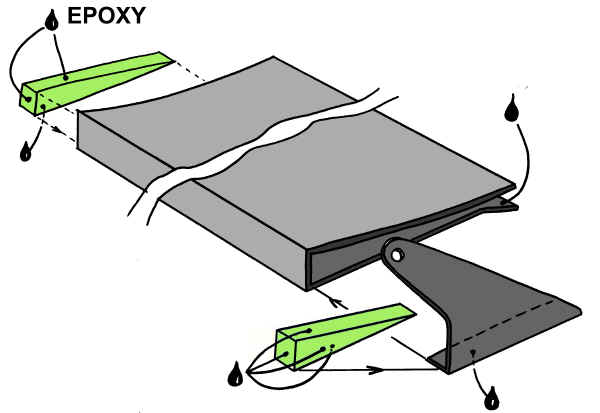
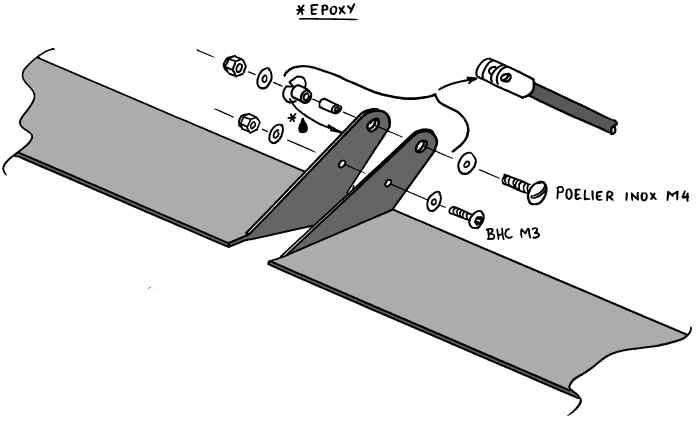
Collez les différents éléments du tab ŕ la colle époxy A-175/400,
pensez bien ŕ faire un droit et un gauche...
Glue the tab parts together with epoxy A-175/400 glue, make one right and one left
parts !...
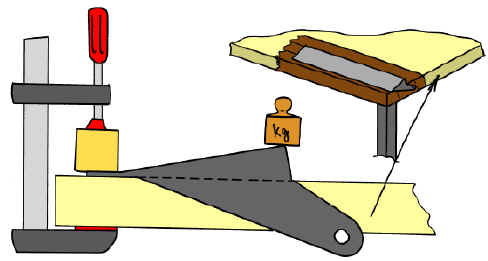
Mettez le tab sur le plan de travail, mettez le bord de fuite en pression
, et plaquez le tab sur la table pour ętre sűr qu'il ne sera pas vrillé.
Put the tab on the table, press the trailing edge, and make sure it's well applied on
the table so it will not be twisted.
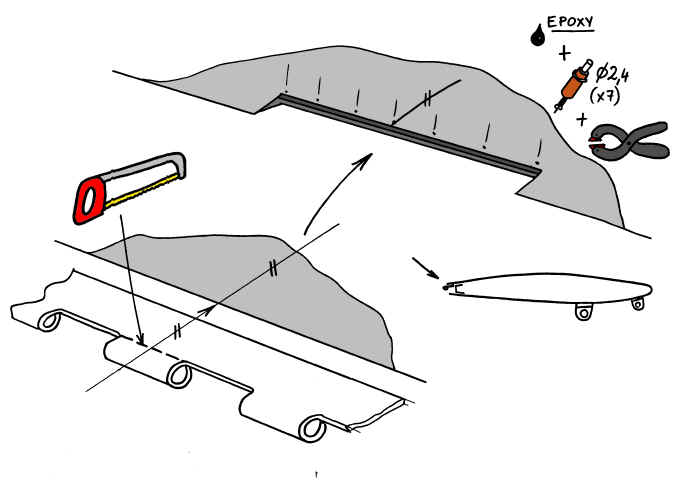
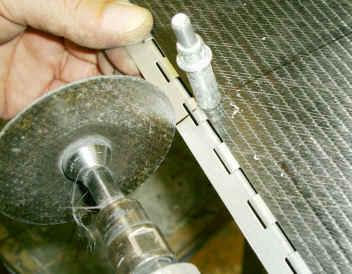
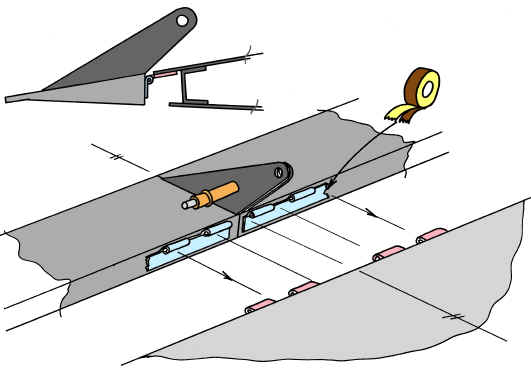
- Découpez le créneau central de la
grande charničre.
- Cut the middle notch of the long piano hinge
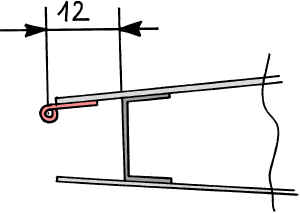
- Positionnez la charničre sous le
revetement supérieur ŕ 12 mm du faux longeron d'empennage
- Place the hinge under the upper skin 12mm behind the elevator false spar
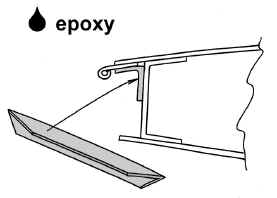
- Positionnez le renfort en carbone
sous la charničre, et contre le faux longeron, au milieu.
- Place the false spar stiffener, under the hinge and against the false spar, in the
middle.
- Percez D 2.4 et bitardez l'ensemble ,
collez ŕ l'épxy A-175/400 et mettez en pression avec des bitards et des pinces. Nettoyez
bien toutes les traces de colle dans la charničre. Aprčs séchage, remplacez les bitards
par des rivets protégés époxy de 2.4 tęte plate.
- Drill and cleco , glue with Epoxy A-175/400 and press with clecos and pliers.
Carefully clean any trace of glue in the hinge. When the glue has cured, replace the
clecos with epoxy coated 2.4 mm round head pop rivets.
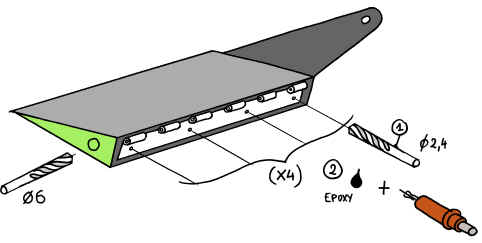
Assemblez les deux motiés du tab avec du scotch et un bitard, mettez le
en position, alignez la charničre et fixez la temporairement avec du double_face.
Désassemblez, percez 4 trous de 2.4 par charničre et mettez des bitards,
Collez ŕ l'époxy, mettez en pression avec les bitards, puis remplacez les bitards par
des rivets de 2.4 protégés époxy quand la colle est sčche.
Assemble the two halves of the tab with one cleco and tape, position it,
and hold the hinge with tape.
Disassemble, drill 4 holes dia. 2.4 per hinge and hold it with clecos.
Glue with epoxy, hold with clecos, and replace the clecos by epoxy
coated rivets when the glue is dry.
Percez un trou d'évent de 6 mm dans les nervures extérieures.
Drill one 6mm venting hole in the outer rib.
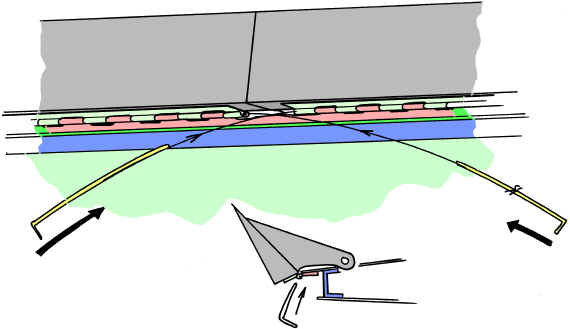
Glissez les cordes ŕ piano de charničres par en dessous
Slide the piano hinge wires from the lower side.
Assemblez le tout comme ci dessus. Ne collez la collerette glycodur que
sur une moitié de tab.
Assemble as above, only glue the Glycodur sleeve on one half of the tab.