
AJUSTAGE DU CAPOT MOTEUR INFERIEUR
LOWER ENGINE COWLING TRIMMING
Préliminaires / foresteps :
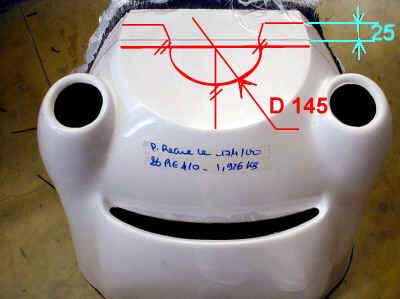
Tracer la découpe du passage du moyeu d'hélice :
- repérer le centre par rapport au diamčtre extérieur (et non par
rapport au soyage qui est légčrement plus haut que l'axe)
- diamčtre du trou : 145 to 155 mm.
Draw the cutting line for the propeller shaft way through :
- Locate its center referring to the outer diameter (and not the step,
which is slighly over the axis)
- diameter : 145 to155 mm.
Percer les trous de refroidissement des cylindres et des radiateurs.
Cut the holes for the cylinder and radiator cooling.
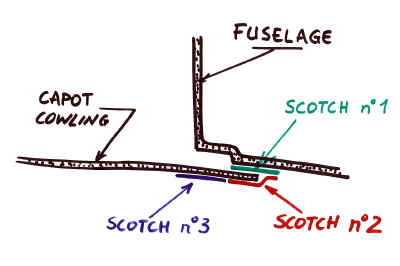
Coller un scotch de peintre de 25 mm de large le long et au
dessus du soyage tout autour du capot.
Tape some 25 mm wide painting adhesive all around the cowling, over
the edge of the upper cowling step.
Découper le rebord le long du scotch (couper au disque diamant ŕ quelques mm du
scotch et ajuster ŕ la ponceuse pneumatique puis ŕ la cale ŕ poncer).
Cut along the tape (first cut at a few mm with a diamond disk, then approach with a
pneumatic abrader and finish with a abrading block).
Faire les découpes de passage du train avant, de l'échappement et le
trou pour la purge.
Make the cut-outs for the gear, the exhaust pipe and the drain.
Pour centrer le capot et avoir un jeu correct entre le cone d'hélice et
le bord d'attaque du capot, il est nécessaire de fabriquer l'outil ci dessus :
- utiliser du contre-plaqué de 12 mm
- diametre extérieur 295 mm, diametre intérieur 47 mm (pour se
centrer sur le moyeu), plus 6 trous dia 8 mm en hexagone sur un diametre de 75 mm pour la
fixation sur la couronne du moyeu. (remarque : 3 trous peuvent suffire pour l'outil)
- cale d'épaisseur 12 mm (permet un jeu de 6-8 mm entre le cone et le
capot) : dia intérieur 145 mm.
In order to center the cowlings and get a correct clearance between
the prop. spinner and the cowlings, make the above jig :
- use some 12 mm thick plywood
- outer dia : 295 mm, inner dia : 47 mm (to fit to prop flange hub),
plus 6 x 8 mm dia bolt holes on a dia 75 mm, to fix the jig on the flange. (Note that you
can do only 3 holes to fix the jig).
- 12 mm thick spacer (allowing a 6-8 mm clearance between the spinner
and the cowlings) : inner dia. : 145 mm.
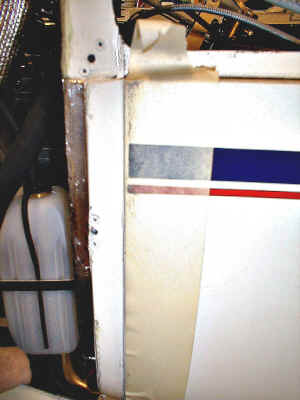
Installation et détourage
Positionning and trimming.
CONSEILS :
TIPS :
Méthode de repérage de la découpe
Cut out location method.
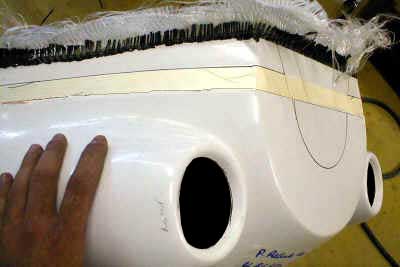
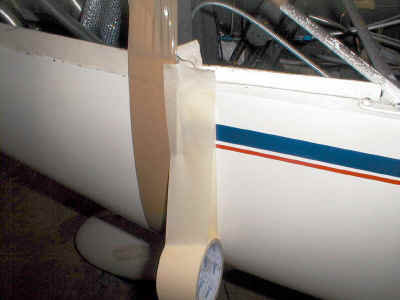
Coller un scotch de peintre de 50 mm de large, sur le
fuselage, le long du bord du soyage du capot.
Tape some 50 mm wide painting adhesive on the fuselage, along the
cowling step.
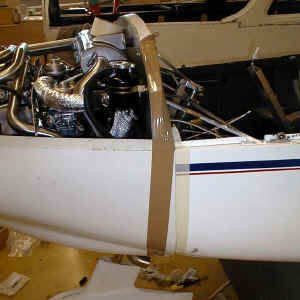
Fixer solidement l'outil sur le moyeu.
Hold tight the jig on the flange.
Installer le capot inférieur :
- alignez l'avant du capot avec l'outil, fixez-le sur celui-ci avec
d'abord du scotch, puis 2 vis de 4 mm une fois que le capot est d'aplomb.
- alignez le bord du soyage avec le rebord cabine et maintenez-le avec
du scotch.
Faites attention de ne pas vriller le capot en fixant l'avant, si nécessaire tourner
légčrement le moteur
Install the lower cooling :
- align the front with the jig, fix it onto the jig with first tape,
then when the cowling is correcly aligned, with two 4 mm diameter screws.
- align the step edge with the cabin edge and hold with tape.
Be careful : don't "twist" the cowling when you fix it on the front : if
necessary turn the engine flange.
Coller bord ŕ bord une autre bande de scotch de la męme
largeur !!! par dessus le scotch précédemment collé sur le fuselage, .
Put a tape of the same width !!! over the tape previously
put on the fuselage.
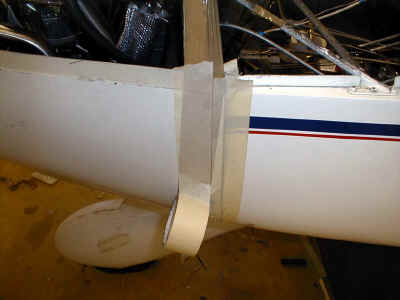
Coller une derničre bande de scotch le long de la bande précédente,
puis retirez la bande qui est ŕ cheval sur le fuselage et la capot.
Put another tape along the previous one, and remove the one that is between the
cowling and the fuselage.
Démontez le capot
Remove the cowling
Utilisez cette derničre bande de scotch comme une référence pour la
découpe.
Use this last tape as a reference to cut the cowling.
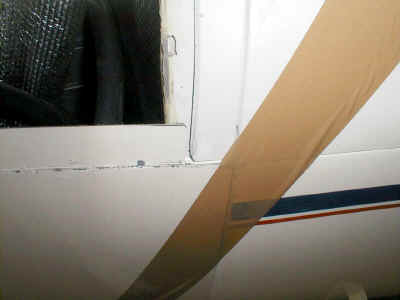
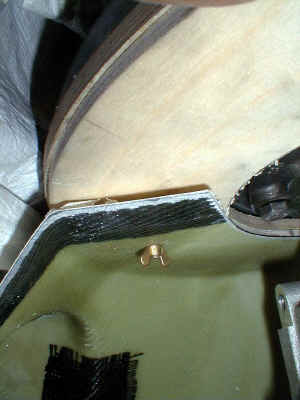
Couper le coin supérieur pour éviter la surépaisseur du pontet.
Cut the upper corner to prevent the highspot due to the bridge upper cowling step.
Trous de fixation :
Attachment holes :
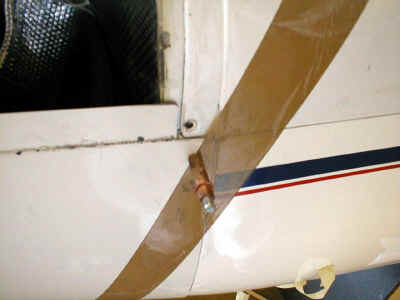
Fixer les deux coins supérieurs avec des bitards (percer ŕ 10 mm du bord
et ŕ 10 mm sous le bord cabine)
Hold both upper corners with cleco fasteners (drill at 10 mm from the cowling edge and
10 mm below the fuselage edge).
Percer les autres trous de fixation réguličrement espacés (3 trous de
chaque côté), du haut vers le bas en plaquant bien le capot contre le
fuselage et en mettant les bitards au fur ŕ mesure pour ne pas que celui-ci
"gondole" entre deux vis.
Drill the other attachment holes with an equal distance between each other, from
the top to the bottom, holding the cowling tight against the fuselage and putting
the clecos step by step, in order to avoid it to buckle between 2 screws.
Percez dia. 4 mm les trous de fixation sous la sortie des radiateurs, en
face des prisonniers.
Drill the attachment holes dia. 4 mm under the radiator exhausts, face to the anchors.
Couper le dessous du capot ŕ la hauteur de la sortie des radiateurs.
Cut the lower part of the cowling at the same station as the radiators exhaust edge.