
COLLAGE DE LA VERRIERE
CANOPY BONDING
Préparation du plexiglas
Plexiglas preparation
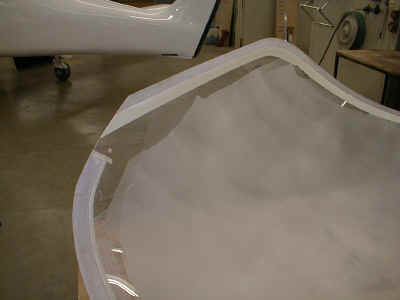
Poser la verričre ŕ sa place sur le fuselage.
Tacer au marqueur (par tansparence) un trait 5 mm au dessus de l'arceau.
Put the canopy on the fuselage.
Draw a line (by transparency) 5 mm above the frame.
Retirer la verričre.
Ôter le film de protection ŕ l'intérieur, au niveau des collages.
Poser un scotch le long du trait précédent.
Dépolir la patie ŕ encoller au papier de verre grain 240, en prenant soin de ne pas
rayer la verričre ailleurs.
Remove the canopy.
Remove the protection plastic film from the inner face, where you will spread glue.
Put a painting adhesive tape along the previous line.
Abrade the part to be glued with 240 sandpaper, be careful not to scratch the canopy
anywhere else.
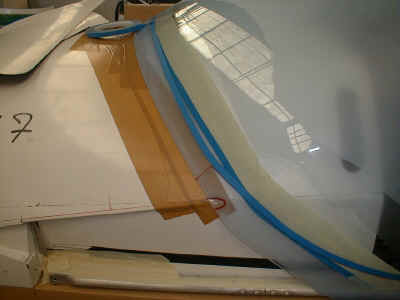
Retirer le film de protection extérieur sur la partie avant, et dans la
zone de collage des joues de verričre.
Poser un scotch ŕ 40 mm du bord sur la partie avant, et tout autour de la position de la
joue de verričre.
Dépolir au papier de verre grain 240. (zone de collage de la bande de carbone UD et des
joues).
Remove the protection plastic film from the front face, and from the
area where you will glue the cheeks.
Put an adhesive tape 40 mm from the edge of the front face, and all around the cheek
position.
Abrade with 240 sandpaper.
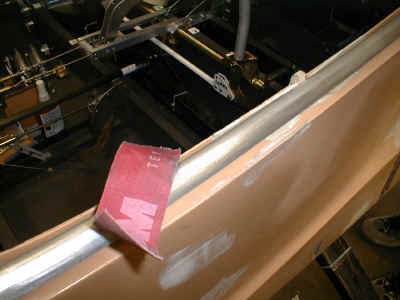
Préparation de l'arceau
Frame preparation
Repérer la position et l'épaisseur des cales du plexi du côté interne
de l'arceau (côté hors collage).
Retirer les cales et conservez-les.
Note on the inner face of the frame (where it won't be erased) the position and the
thickness of the spacers for the canopy.
Remove the spacers but keep them.
Passer l'arceau au scotch-brite ou au papier de verre fin pour retirer la
couche d'alumine.
Abrade the canopy frame with smooth sandpaper or Scotch-Brite to remove the alumina.
Dégraisser.
Degrease.
Recoller les cales (bon emplacement, bonne épaisseur). Utilisez de
préférence de la colle contact. Vérifier le calage en positionnant la verričre sur le
fuselage. Procédez aux ajustements nécessaires.
Glue the spacers (respect the places and the thickness). Use "cyano" glue by
preference. Check that the canopy fits well on the fuselage, if necessary adjust the
spacers.
Préparation des joues de verričre
Canopy cheeks preparation
Poncer le gelcoat dans la zone recouverte par la bande de carbone
UniDirectionnel.
Remove the gelcoat on the area that will be covered by the UniDirectionnal carbon
stripe.
Préparation du pontet
Bridge preparation
Recouvrez la zone du couvre joint de verričre avec du scotch d'emballage,
en évitant de faire des plis et des surépaisseurs importantes. Cirez et lustrez
soigneusement cette zone.
Put some packaging adhesive tape on the bridge area where the canopy joins, avoiding
pleats and excessive thickness.
Collage
Bonding
Si l'air est sec, mettez une bassine d'eau dans le fond du fuselage.
If the air is very dry, put a basin of water in the fuselage, to help the drying of
the MS Polymer MSP15 glue.
- Dégraisser la verričre ŕ l'acétone. (ne pas insister pour ne pas ternir la
verričre)
- Degrease the canopy area to be bonded with acetone. (do not insist to prevent the
canopy to get white).
- Dégraisser l'arceau de verričre.
- Degrease the canopy frame with acetone.
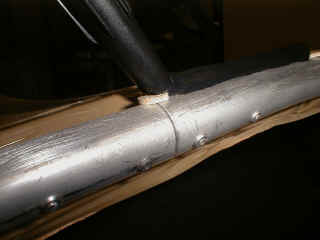
- Vérifier que l'arceau est bien en place
sur le fuselage, actionnez plusieurs fois les ouvertures de verričre depuis
l'extérieur pour en vérifier le fonctionnement.
- Check the correct positionning of the frame on the fuselage, and actuate the opening
system from the outside to check it works well.
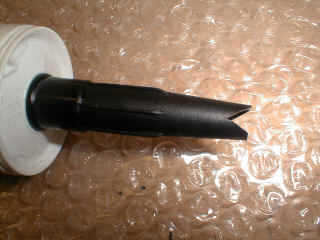
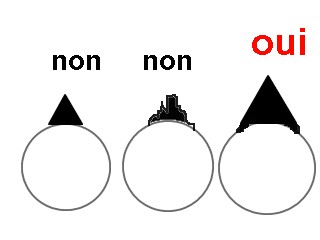
- Découper la buse du pistolet.
- Cut the glue cartridge spout as shown.
- Encoller l'arceau de verričre. (colle MSP 15). Vous avez 10 minutes avant la
formation d'une pellicule en surface.
- Bond canopy frame with MSP 15 glue. You only have 10 minutes before a film
appears on the surface.
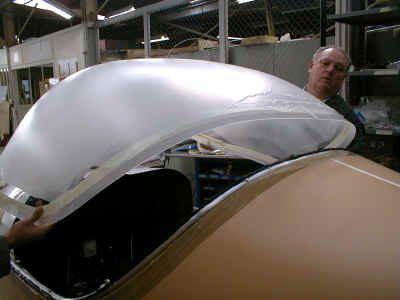
- Poser le plexiglas en place en commençant par l'arričre, en alignant
les repčres de centrage. Maintenir en place avec du scotch.
- Put the plexi on , beginning from the back, and respecting the centerline marks.
Hold on place with tape.
Si il y a des endroits oů la verričre dépasse du fuselage, scotchez des bâtonnets
sur le fuselage pour appuyer sur le plexi.
If there are some places where the canopy is too large, tape some wood sticks on the
fuselage that push on the canopy.
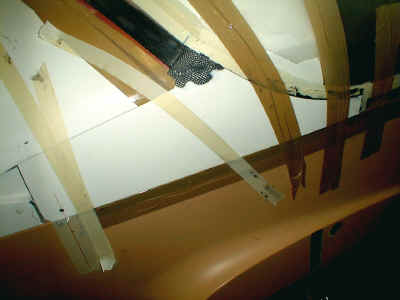
- Mettre du scotch pour maintenir la verričre en place.
- Hold the canopy in place with tape.
- Encollez l'arceau et la verričre au niveau des joues avec la colle MSP 15. Retirez
le tissu de délaminage. Collez les joues et maintenez-les avec du scotch.
- Spread some MSP15 glue on the canopy and on the frame to glue the cheeks. Remove the
delamination sheet from the cheeks. Glue them and hold them with tape.
- Laisser sécher 48 heures ŕ 20°C.
- Let it dry for 48 hours at 20°C.
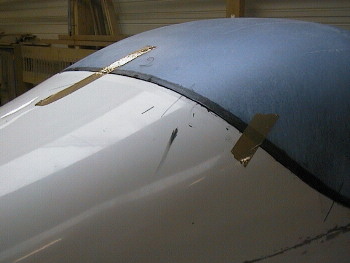
![]() - Aprčs
séchage ouvrir délicatement la verričre.
- Aprčs
séchage ouvrir délicatement la verričre.
- After drying carefully open
the canopy.
![]() -
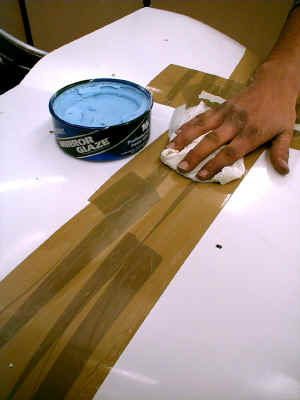
Regarnir si nécessaire de colle tout en laissant les protections.
-
Regarnir si nécessaire de colle tout en laissant les protections.
- Run a bead of glue around the
joint it necassary ; let protection in place.
![]() -
Laisser sécher.
-
Laisser sécher.
- Let it dry.