
______
VOILURE / WINGS
MCR Club
Passage de la bielle de commande / Control rod routing
1. Montage du renvoi / Bellcrank mounting
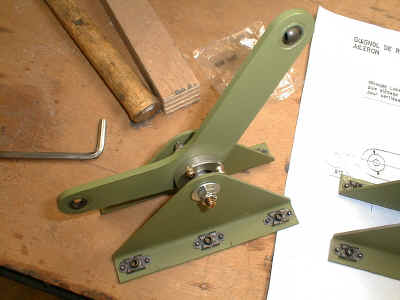
Assemblez les renvois d'ailerons sur leurs supports, en faisant un montage droit et un montage gauche :
Mount the bellcranks on their respective supporting structure (make a left and right assembly) :
Mount the assembly onto the false spar with 4*20 hexagonal socket head screws. The small leg is directed towards the wing tip, the upper supporting structure is the largest one.
a. guide bielle / rod guide
Placer le gabarit de centrage dans les trous des nervures d'emplanture.
Monter les guide bielle sur les gabarits de centrage et contre-percer les trous Ć 5 mm.
Place the centering device into the root rib holes.
Mount the rod guides onto the template and back-drill 5mm diameter holes..
Poncer, dépoussiérer et dégraisser la zone ŕ encoller sur les nervures, blanchir au
papier de verre 120 les rondelles des guide bielle.
Abrade, vacuum-clean and degrease the rib surfaces to be bonded, unpolish the rod
guide washers with glass paper (120).
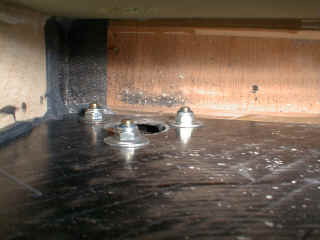
Coller les guides bielles avec les cales en bois ŕ la colle époxy XE-2162. Serrer
(doucement pour ne pas chasser complčtement la colle) avec les vis tęte H 5x20, les
rondelles 5x16 et les écrous nylstop.
Stick the rod guides with the wooden spacers with XE-2162 epoxy glue. Wrench
(carefully not to blow out the glue) with 5*20 hex head screws, 5*16 washers and nylstop
nuts.
b. chape / clevis
Enfilez l'embout ŕ chape le plus court (L 70mm, perçage D 5mm) ŕ une extrémité de
chaque tube de bielle en alu. Si on doit forcer, poncez la chape pour avoir un léger jeu
(nécessaire au film de colle).
Insert the shortest clevis (L= 70 mm, 5 mm diameter), into one end of each aluminium
rod. If you need to insist, abrade the clevis to make a small clearance (mandatory for the
glue layer).
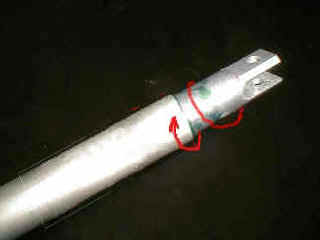
Avec de la Loctite 648 "Blocpresse", collez la chape dans le tube en
l'enfonçant jusqu'au fraisage. Enfoncez la pičce doucement, en tournant, pour bien
répartir la colle.
Using Loctite 648 "Blocpresse", bond the clevis into the tube. Insert it up
to the milled part, smoothly, making it rotate to spread the glue evenly.
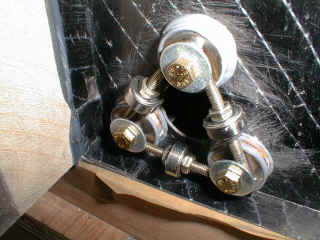
Laissez sécher (1h) puis rivetez : 3 rivets pop D 3.2x8 TP, disposés en triangle ŕ
env 30mm de l'extrémité du tube.
Leave it to dry out (one hour), then rivet : 3 3.2*8 TP "pop" rivets, in a
triangular pattern, approximately 30 mm from the rod end.
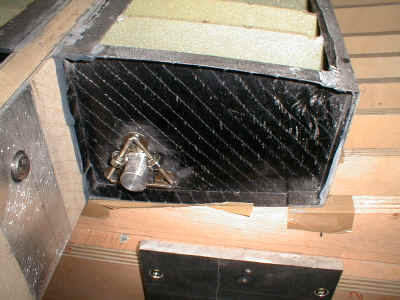
3. Débattement / Angular movement.
Glissez la bielle dans l'aile et montez la chape sur le renvoi.
Insert the rod into the wing and mount the clevis onto the bellcrank.
Actionnez l'ensemble et poncez les trous pour que la bielle ne frotte pas sur les
nervures (jeu 2 ŕ 3mm). Le débattement du renvoi est d'environ +- 20° autour du neutre.
(neutre défini par l'alignement des trous dans les supports et dans le renvoi).
Operate the rod and abrade the holes so that the rod does not scrape the ribs (leave a
2 to 3 mm clearance). The bellcranck angular travel is approximately +- 20° around the
neutral position (defined by the alignment of the holes both of the supporting structure
and the bellcrank).